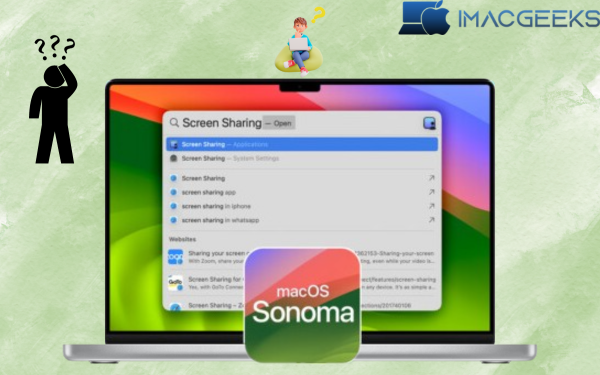
Need technical support or want to collaborate with others while you’re away? Sharing your Mac screen allows others to view your desktop in real time. This tutorial will explain how to Screen Sharing in macOS Sonoma. Allow us to begin!
How to Using Mac’s built-in Screen Sharing program
You don’t have to use an external app to share the screen of your MacBook. Apple has a screen-sharing program built into MacBooks. These tools will help you do it quickly and efficiently. Let’s start by examining the instrument’s reasonable bearings.
Needed Before
- You need to have at least macOS Monterey installed on both Macs.
- Both Macs should have a good internet connection and be linked to the same network.
- Both Macs must have the ability to share the screen turned on.
- The person who wants to share their computer must have the right permissions.
How to use Mac Screen Sharing software setup
- Find the Apple logo (◊) and go to System Settings.
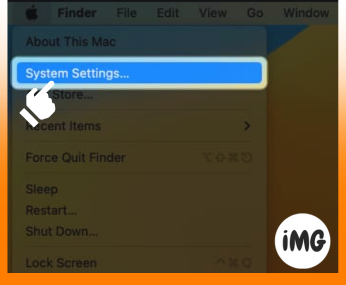
- Go to “General” and pick “Share.”
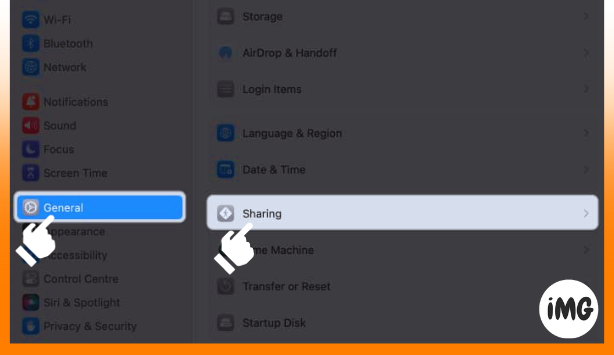
- Turn on sharing your screen.

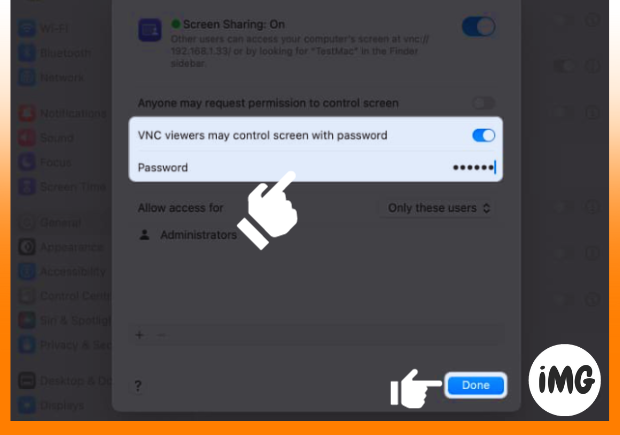
Screen Sharing for macOS Sonoma Make sure no one else has control of your screen. This might jeopardize your sensitive information. To make screen sharing safer, follow these instructions.
- Click “i” next to Screen Sharing when done.

- Turn on Anyone can ask to be able to direct the screen.
So you have to give permission every single time before you can share the screen. - The next step is to turn on VNC users may control screen with password.
- Type a password where it says “Password,” then click “Done.”
You can also let certain people see and use your screen sharing. Press the plus sign at the bottom → Pick a person from Users & Groups or Network Users → Press “Select.”
How to Mac Screen Sharing instructions
Screen Sharing for macOS Sonoma” Follow the procedures outlined below to ensure that the two computers can connect remotely.
I want to run my Mac:
- In System Settings, select General > Sharing.

- Access more information by pressing “i”.
- Write down the Mac name or IP address.

Mac that you can use to:
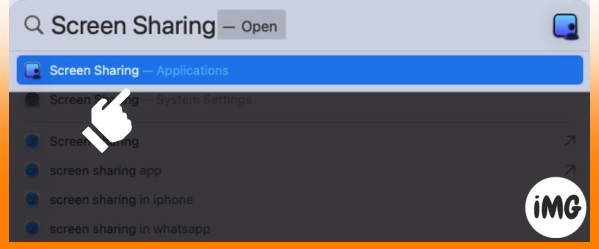
- Click on “cmd + space bar” to open Spotlight. Find “screen sharing” and start.
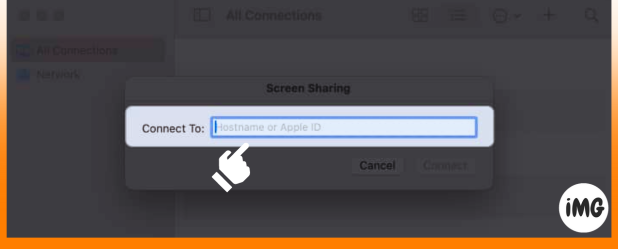
- Make sure you’re connected to all of them → Press the plus sign.
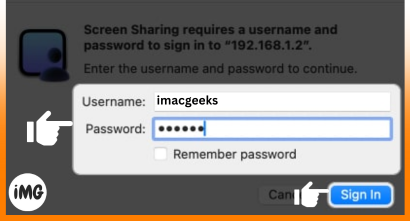
- Type in the Apple ID or IP address of the Mac you want to run from afar.
- Type the Mac’s username and password to connect to it → Sign in by clicking Sign In.
The screen of the Mac that you wish to see from a distance will now appear in a separate window. Click Accept when you are done. Now you can access different files and directories on the distant device, change the order of the files and directories, use apps and more.
Ensure that both of your devices are on a similar organization before you follow these means.
How to Controlling another Mac’s shared screen
Screen Sharing in macOS Sonoma following buttons are in the window’s Status Bar.
- Control Screen: This choice gives you full access to the remote Mac’s screen, so you can see and change what’s on it.
- Dynamic Resolution: This feature matches the distant screen’s resolution to your local display to ensure proper viewing and use.
- High Dynamic Range: Supports HDR material, which increases visual quality if your screen can handle it.
- Launchpad: This option lets you quickly open apps on the remote Mac by letting you reach the Launchpad.
- Mission Control: Use Mission Control to order and manage open programs and desktops.
- Desktop: Go to the desktop of the faraway Mac and work with files and folders there.
- Zoom: You can get a better look at material by zooming in on certain parts of the remote screen.
- Real Size: Set the zoom level on the remote screen back to its real size.
- Scale Up: Make the information on the remote screen bigger so you can see it better.
- Scale to Fit Window: Change what’s on the remote screen so it fits in the window of your local Mac.
You may even use the trackpad on your main Mac to control the other device remotely. One thing you can’t do is swipe three fingers to change displays. However, you may use buttons to explore and launch applications.
A second Mac’s Screen Share functionality may be used to connect to a third Mac, and so on. Giving you complete control over all of your devices using your primary Mac. This is similar to the concept of a boss and a slave, with one gadget controlling another.
Besides the Screen Sharing app these other ways can also be used to share your screen.
How to Screen sharing on Mac using iMessage
- On your Mac open the Messages application.
- You can share your screen with someone by going to their chat.
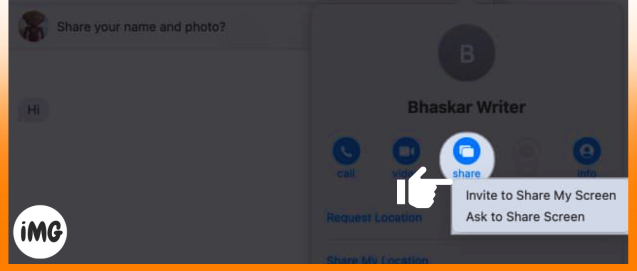
If you’ve never met this individual message them first. - Pick “I” in the upper right to open the data board.

- Pick Share. Do one of two things now:
- Ask to See My Screen: Let them take charge of your screen.
- Request to Share Screen: Ask to see the contact’s screen and let them know you want to handle it.
- Ask to See My Screen: Let them take charge of your screen.
FaceTime call: Show your Mac screen to the other person
FaceTime, available on Apple devices, allows you to video chat with friends and family all around the world. You can engage in group talks or communicate with intimate friends and relatives. FaceTime allows you to showcase your latest innovation or teach someone a new app.
Third-party Mac screen-sharing services
In addition to the choices mentioned above, you may share your Mac screen with third-party apps. These applications provide complete screen sharing control and other capabilities that the original apps lacked. Check out our article on the top screen-sharing apps for Macs to discover an alternative software with more features.
FAQs
How do I let another Mac user see my screen? What do I need?
You will need the IP address, Apple ID, or Bonjour name of the other Mac in order to share your screen (if they are on the same local network).
If I share my screen with someone outside my local network, can they see it?
Someone on a different network can view your screen. Set up your network properly and utilize a VPN or SSH tunnel for added security.
Is it safe to share my screen on a Mac?
Sharing your screen is normally secure, as long as you only share it with individuals you know or use password security in the Screen Sharing Settings. However, if you wish to share your screen over the internet, you must utilize encrypted means to ensure safety.
I want to share my MacBook screen with my iPad or Apple TV. How will I proceed?
AirPlay allows Apple TV and iPads connected to the same Wi Fi to see what is on your Mac’s screen. Click Control Center in the menu bar. Select Mirror Screen. – Choose the device to which you wish to mirror your screen. – Click to mirror the built-in display.
Share your screen quickly!
You may stream games, view movies, or deliver a presentation while sharing your screen with others. Macs’ built-in programs make screen sharing simple. To connect to your Mac from a different connection, go to your router’s configuration page and modify the way data flows via a port. Want to learn more? Tell me your ideas.