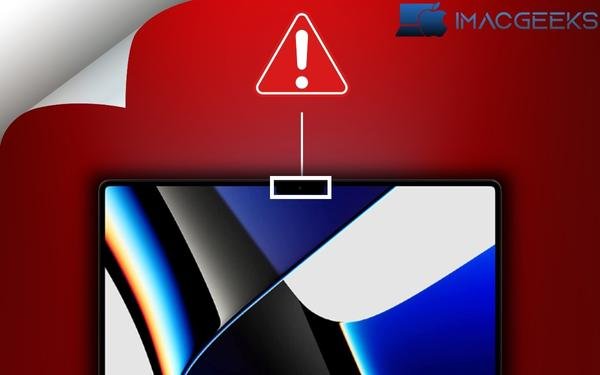
MacBook camera attending a virtual conference, taking an online lesson, or just streaming films and sharing moments with friends via FaceTime, utilizing a MacBook camera offers a degree of convenience and comfort that much outweighs the restricted real estate of a mobile screen.
A failing camera degrades the digital experience and may possibly prohibit you from doing your duties. There are various ways to fix a non-working MacBook camera.
Typical causes of a MacBook camera not working
Here are some of the typical reasons that your MacBook camera isn’t operating properly:
- Lack of internet connection
- Software malfunction
- Changes in camera settings
- Corrupted application or settings
- Incompatible with software upgrades
- Physical harm
- Wear and Tear
11 Simple Methods to Fix MacBook Camera Not Working
Before we go into troubleshooting methods, it’s important to note that the Mac’s built-in FaceTime or FaceTime HD camera turns on immediately whenever you launch a program that supports it. A green indication light will appear beside the macbook camera to show that your Mac is currently utilizing the camera.
However, each app has its own camera-specific options. Simply launch the app, navigate to the menu bar, pick Preferences, and then search for Video or Camera settings. Now that we’ve covered the basics, let’s look at some simple remedies for Mac camera not functioning.
Fix the FaceTime camera not working on the Mac
Since most customers complaining about their macbook camera have troubles with FaceTime more than any other program, let’s start there. Here are several ways to make FaceTime function on your Mac. Close and reopen FaceTime.
- Restart your Mac.
- If you’re utilizing your iPhone’s camera, check Continuity.
- Make sure you’re using the proper camera and microphone.
Some of these will be covered in further detail in the following sections.
Similarly, if you’re having problems with Zoom, here are some solutions to make it function on your Mac.
Restart, update, or reinstall the application
Whether it’s FaceTime or another software, a simple restart or force stop will clear up flaws and problems that prevent it from interacting correctly with your Mac’s camera.
whether you just noticed this issue after updating your macOS, you could wish to see whether the software can be updated for improved compatibility. Otherwise, try deleting and reinstalling the software.
Select the appropriate camera in the app’s settings
If you have more than one camera attached to your Mac, go to Preferences and pick the built-in camera.
Check it again: Take the camera out of another app that needs it
Sometimes it’s not the camera on your MacBook camera not working that’s broken, but an app. To make sure, open a different app that uses the camera, like a video chat app, and make sure everything works. What’s wrong is with the app, not your camera, if it does.
Update your Operating System
Make sure your Mac is running the most recent version of the operating system. Software upgrades address flaws and issues that may prohibit built-in programs and features from functioning properly.
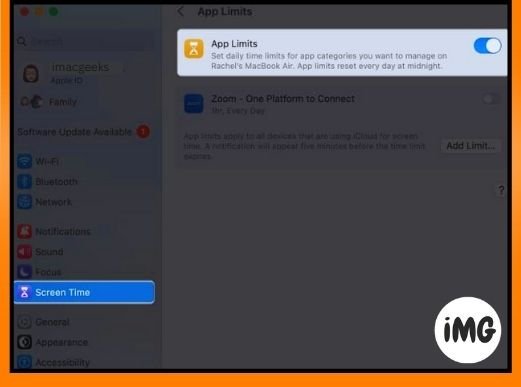
Check the Screen Time settings
If you’re using Screen Time, it’s conceivable that the feature is preventing you from utilizing the camera, or that the app you wish to use does not have enough time left. To check:
- Navigate to Apple Menu → System Settings.
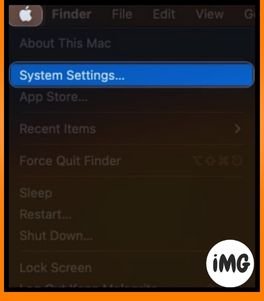
- Select Screen Time on the sidebar. Tap Content and Privacy.
- Select App Restrictions. Toggle on Allow Camera. Click Done.
- Navigate to Application Limits.
Make sure the app you wish to utilize the camera with is switched off or not chosen to avoid Screen Time preventing you from utilizing it.
Allow Camera Access
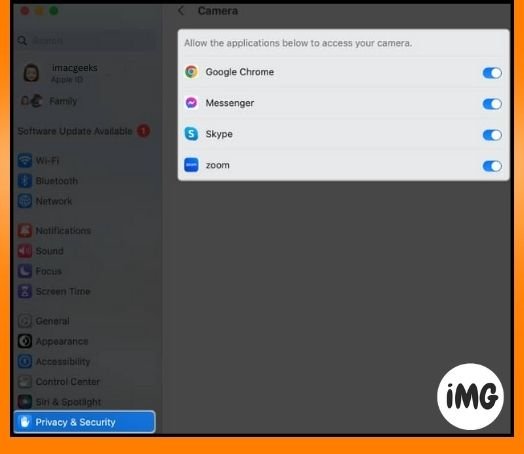
As an extra security feature in macOS Mojave, you can now specify which apps may use your Mac’s built-in camera. It is conceivable that you are unable to access the camera on your Mac due to a lack of access. To provide the application access:
- Select Apple Menu → System Settings.
- On the sidebar, select Privacy & Security → Camera.
- You’ll get a list of all the apps that require access to your camera. Toggle all of the applications where you wish to use your camera.
- To utilize the camera in certain applications, you may be requested to exit and reopen them.
Force-quit conflicting applications
Using your camera for many apps at the same time might cause issues as well. You can also be denied permission.
- To fix this, check the Dock for any open apps that you aren’t currently using. Control-click the program and choose Quit.
- If the program stays in the Dock, go to Finder → Applications → Utilities → Activity Monitor. To force quit an app, select it and click the X icon at the top.
Check your antivirus program
If you’ve installed antivirus software on your Mac, check the settings to make sure it’s not blocking programs from accessing your camera.
Restart the Mac or SMC
If you’ve tried all of the procedures listed above and your camera still doesn’t function, restart your Mac. If you have an Intel-based Mac, you may wish to reset the System Management Controller (SMC), which manages low-level settings.
While it is mostly responsible for managing fans and LEDs, it may also create issues with your internal webcam, so resetting it may assist. If your Mac is built with Apple silicon, simply restart it.
Set up a new user account
Creating a new user account may allow you to access your Mac’s camera. To accomplish this:
- Select Apple menu → System Settings.
- Choose Users & Groups → Add Account.
You may be required to enter your password. - Make sure you choose Administrator as the kind of user.
- Enter all of the required information, including your full name, account name, and password.
- Select “Create User.”

Check to see whether you can access your MacBook’s camera with your new administrator account.
Check for hardware issues
Here are some methods for determining whether a hardware problem exists and what you can do about it.
Check the camera’s indication light
Open a camera-based app, such as FaceTime. Check to see whether your Mac’s camera indicates light. If not, there might be a hardware issue.
See whether Mac detects its camera
It is critical for your MacBook to be able to recognize its camera before using it. To check:
- Navigate to Apple menu → System Settings.
- Navigate to General on the sidebar and then About.
- At the bottom, click on System Report.
- Select Camera from the Hardware menu. Check to check if you can see the FaceTime HD Camera, as well as its model and unique ID.
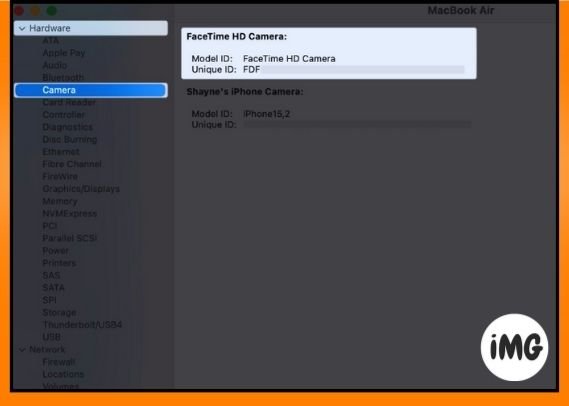
If you don’t see the FaceTime HD Camera mentioned under Camera or its information, your Mac may not be detecting the camera.
Reset Your Mac Camera
You can try resetting your Mac’s Camera in Terminal with the VDCAssistant Command. VDCAssistant is a process that manages camera controls. This method may continue to function even after the camera-related app has been closed. This may block other programs from accessing the camera on your Mac. How to reset it:
- Start Terminal.
- Type the following into the Terminal window: Sudo kill all VDCAssistant and AppleCameraAssistant
- You may be requested to provide your administrative password before running the program.
Run the Apple Diagnostics
Running Apple Diagnostics might also help you determine which hardware component is causing the camera issue. When you run Apple Diagnostics, a report will appear on your screen. If you encounter error codes beginning with N, it means you have an issue with your MacBook’s camera.
You should go to the local Genius Bar or Apple Store for assistance.
External webcam isn’t working on Mac
If you’re not utilizing your Mac’s built-in camera and are having issues with your external webcam, here are some possible options to get it working again:
- Ensure that your cable and port are clean. Dust and filth might disrupt the connection.
- Try connecting the camera to a different port.
- Check for hardware compatibility.
- Update the webcam software.
Finishing up…
Did any of the techniques listed above help you restore your MacBook camera’s functionality? If so, please share your experience below!
