The innovative new tool called as Stage Manager enables you to execute a variety of functions. It makes working with several windows and programs more efficient and productive. This blog post covers how to utilize Stage Manager on both a Mac and an iPad. We’ll cover everything from turning it on and off to toggling between zones and app groups. How to use Stage Manager on Mac and iPad.
Things to know:
- If you want to use Stage Manager, your device must have at least macOS Ventura or iPadOS 16 installed.
- How to get to Stage Manager:
- On a Mac, open the Control Center and go to Stage Manager.
- iPad: Go to the Control Center and then Stage Manager.
- On a Mac, open the Control Center and go to Stage Manager.
What is a Stage Manager?
On macOS and iPadOS, the Stage Manager allows you to multitask. This component makes it easier to discover programs on your workspace by better organizing them. This reduces the number of distractions on your desktop.
Users may group windows together by dragging and dropping them from the side over other programs. When you launch Stage Manager, the window for the program you’re using will appear in the center and stand out. On the other hand, the other open app windows are arranged on the left in the order of the most recently used apps.
Stage Manager for Mac and iPad” The thumbnails display a live view of the window, allowing you to notice changes such as new messages without switching apps. Depending on your screen size, you can view up to six thumbnails at once.
How to use MacOS Sonoma/Ventura Stage Manager instructions
Stage Manager is available on all Macs running macOS Ventura. This includes Intel Macs. However, it is not enabled by default. Before using Stage Manager, let’s deactivate and activate it on your Mac.
Turn on/off Stage Manager
On the Settings
- Click on the Apple menu and then pick System Settings.
- Pick Desktop & Dock from the list on the left.
- From the right side, scroll down until you reach Windows & Apps.
- Turn on or off Stage Manager.

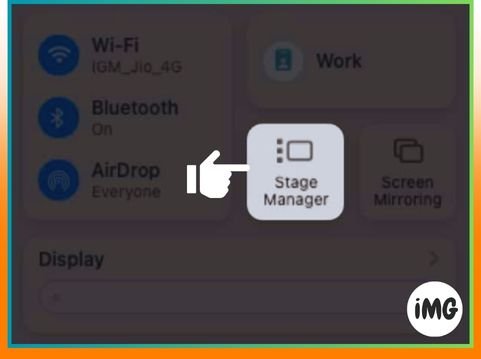
By way of Control Center
- To access the Control Center, select it from the menu.
- To activate or deactivate Stage Manager, simply click its icon.
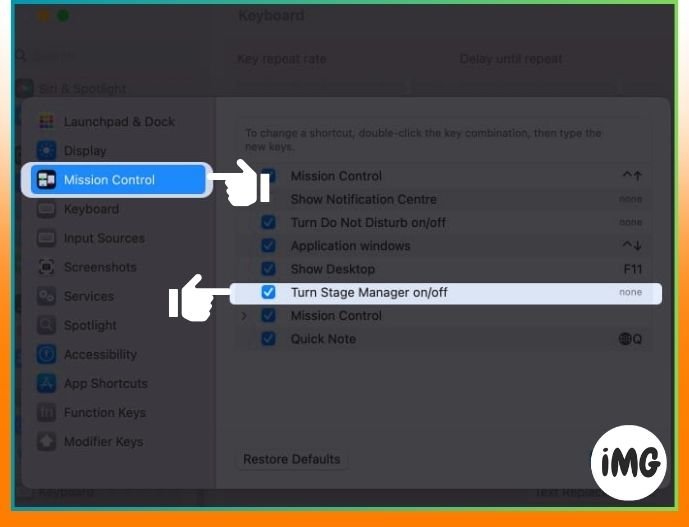
Make a shortcut on your computer to turn Stage Manager on and off.
- Access the Apple menu, then select System Settings, and finally Keyboard.
- Select Keyboard Shortcuts.
- Click on Mission Control here.
- Press and hold the “none” button next to the Stage Manager for two seconds.
- Type in the computer command you want.
- Just hit “Done“.
When you use this computer function, the Stage Manager will either be on or off.
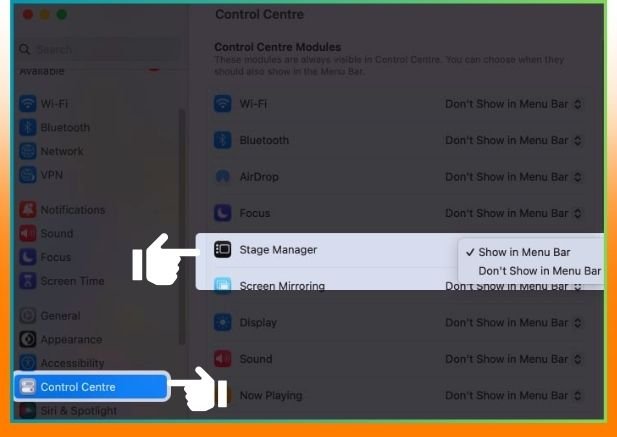
Show or hide Mac menu bar Stage Manager
Putting Stage Manager on your Mac‘s menu bar makes it much easier to access. Simply drag the Stage Manager button from the Control Center onto the menu bar. To delete a symbol, hold the Command (⌘) key and drag it to the trash.
You can also open the Control Center from the Apple menu, click the menu icon next to Stage Manager, and choose Menu Bar or Don’t Show in Menu Bar.
To activate or deactivate Stage Manager, use the corresponding menu item. Click on Stage Manager Settings to make changes.
Stage Manager settings change
- For Desktop & Dock, go to the Apple menu and select System Settings.
- Click on Stage Manager and then click on Customize.
- Here, you may toggle this on/off,
- Recent apps —This option shows new apps you’ve used on the left.
- Screen items — This command shows things that are on your screen.
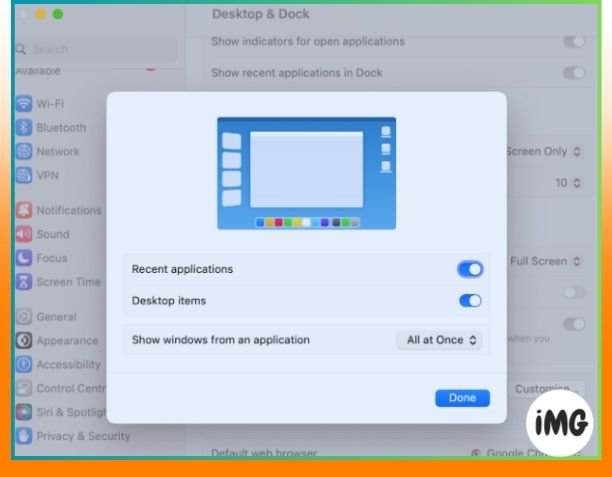
- After that, click the menu next to Show windows from an app and choose
- All at Once: To see all of an app’s open tabs on one screen.
- One at a Time: Only show the part of an app that was last used on the screen. In the event that you click on them from the left you can open different windows.
- To leave the window click “Done.”
Mac desktop organization using Stage Manager
Note:
- When ‘Recent applications’ is disabled, slide the cursor to the screen’s left border to briefly show recent apps.
- Outside Stage Manager, full-screen and split-screen windows live. Swipe left/right with three/four fingers or use Mission Control to access them.
Group apps – Open the app you want to add to the group. Now open the group, drag the program from the list of recently used applications to the middle of the screen, and then dismiss the group. Holding down the Shift key while touching the window’s thumbnail groups it with the other open programs.
Ungroup applications – To eliminate an application, drag it to the left side of the screen (in the screen) and drop it there.
To hide/unhide an app – To display or hide an app, navigate to its window and hit Command (⌘)+H. The app will never again display in the list of recently used apps. To reopen the app, click on it in the Dock or use Command (⌘)+Tab. Then, tab to pick the app and release the keys.
Reposition or overlap windows – To move or combine windows, click anywhere on the title bar and drag it to where you want it. Of course, you can combine windows too.
Resize windows – by moving the mouse to the application window’s edge. Press and drag the window edge to resize it when you see the change button. When you’re done, release your finger.
How to use iPadOS 17 Stage Manager
Apple no longer limits the Stage Manager to iPads with M series chips, which is a good thing. You may use the tool with iPadOS 17 or 16.
- iPad Air (5th Gen)
- iPad Pro 11-inch” (all generations)
- iPad Pro 12.9-inch (3 Gen and later)
Stage Manager on iPad on/off
On the Settings
- Go to Settings and then Home Screen & Multitasking.
- Press the Stage Manager button.
- Turn iPad Stage Manager on and off.
- You can likewise check or uncheck this case.
- Recent Apps: This setting lets you choose whether to show recently used apps on the left side.
- Dock: To show or hide Dock when Stage Manager is running.

By way of Control Center
- Start up Control Center.
- Press on the Stage Manager button.
- The background of the icon goes white when it is turned on.
- Hard-press the button to change how Stage Manager works.
- Now, click on or off
- Brand new apps
- Dock
Note: If the Stage Manager symbol is not visible in the Control Center, navigate to Settings → Control Center → tap + next to it.
Stage Manager lets iPad users multitask many windows
Create groups of apps—any of
- To add another window, tap the three dots at the top of a window. The most recent app window will now show up. Pick the one you want to group.
- Drag an app from Dock to the centre of the screen.
(Swipe up from the bottom to view the Dock) - Pick it from the recently used apps. Hold down and drag to screen center.
To adjust the size of any window, slide the black curve at the bottom left or right in or out. Then, raise your finger to adjust the size of the app. To resize with a mouse or keyboard, place the cursor on any border and drag in or out when the arrow appears.
Add a window to the list of recently used apps – Just like on macOS, you just need to shrink the window. Use the three dots to get to the Minimize menu.
Make the window bigger – Press the button with three dots and choose Zoom.
Reposition a window – To move a window, touch, hold, and drag the title bar, then drop it where you want it.
Switch between apps – tap on a different app in the Dock or the list of recently used apps. The group of apps you’re looking at goes to the left right away making room for the app you want. Utilize four or five fingers to swipe left or right.
See all active apps – See all running applications Swipe up from the bottom and stop in the center to open the App Switcher.
See all of the app’s open windows
- Press and hold the app icon in the Dock for a while then choose Show All Windows.
- From the list of recently used apps, tap the app’s name.
- Start App Switcher and tap on the app title.
FAQs
How do I connect my iPad and Mac?
Utilizing AirPlay, you can transform your iPad into a second screen for your Mac. This lets you operate the iPad and Mac simultaneously.
Does Stage Manager only work with M1?
Absolutely not. Stage Manager will work on all Macs that get the new update to macOS 13 Ventura.
That’s basically it!
Stage Manager will change how we do more than one thing at once on our iPad and Mac. Additionally, what number of applications are running behind the scenes while you read this? Give your opinion below.