Our behaviors are so reliant on iPhones and Macs that doing without them seemed impossible. You would undoubtedly utilize Location Services for food delivery or navigation because these devices are always with you. How to check your location history on iPhone, iPad, and Mac
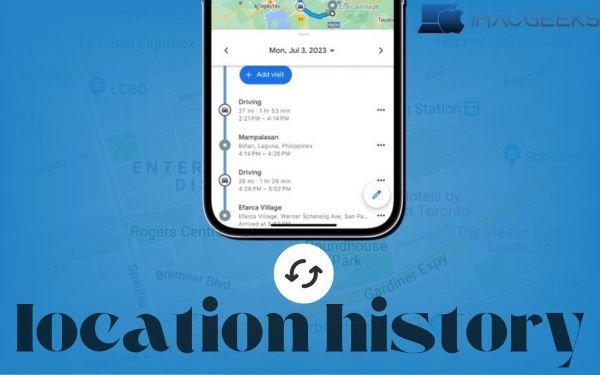
One lesser-known advantage is that your smartphone may also be used as a travel journal. This may help you recall where you were and what you did. See where you’ve been on your iPhone, iPad, and Mac using Apple Maps.
How does location history work?
If you enable Location Services, Apple can track you. Sites and applications may use Bluetooth, cellular, Wi-Fi, and GPS data to determine your position.
Here are some built-in tools that might use your location:
- Maps: will show you roughly where you are right now.
- Camera: To mark where you took a picture with your camera
- Calendars: To remember where your next meeting is, use a calendar.
- Weather: Give you information about the weather where you are.
How to identify location-using iPhone applications
When you install applications that use Location Services, they will request permission to access your location immediately. The question also explains why they desire it. To find out which applications may detect your location:
- To get to Privacy & Security, go to Settings.
- Click on Location Services. Scroll down to view location-aware applications.

Your iPhone and other iCloud-connected devices save your current and previous locations under “Significant Locations.”
What are significant locations? Your location history displays your most recent trips and their times. It is completely encrypted.
How to Check iPhone and iPad location history
Until iOS 16, your iPhone could only show you a short list of your recent locations. It may now summarize the number of records based on time range.
Note: With Location Services enabled, your iPhone only remembers previous locations. Turn it on under Settings > Privacy & Security. Turn Location Services on or off.
- To get to Privacy & Security, go to Settings.
- Press on Location Services.
- Click on System Services at the very end of the list.
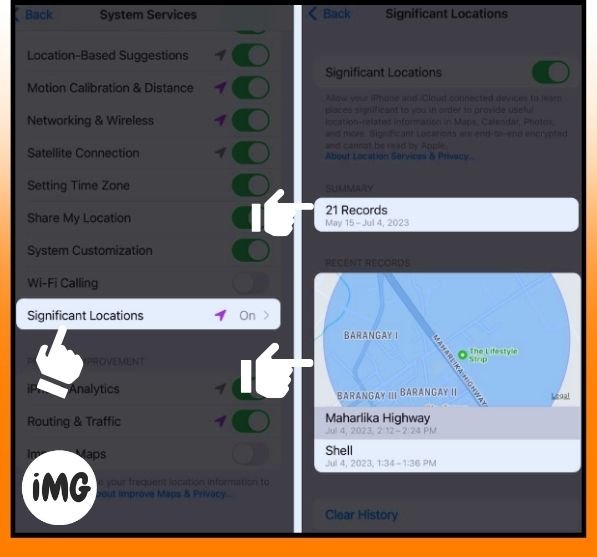
- Click on Important Places.
You’ll be asked to prove who you are with your Passcode or Face ID. - You’ll see a list of your Location Services and the most recent records.
You can’t see your family and friends’ past locations from afar, but you can use Find My to see where they are right now.
How to Clear iPhone/iPad location history
- To get to Significant Locations, follow steps 1–4 from above.
- At the bottom, tap Clear History. To be sure, click Clear History.
How to check Mac location history
Since the introduction of macOS Monterey, forum members have reported that Apple removed the option to access a full history of where a machine has gone, much as it did with the iPhone and iPad. To determine where key stuff are on your Mac:
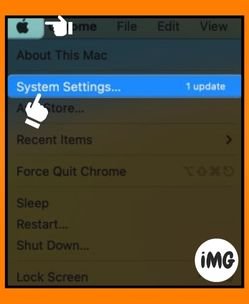
- Apple menu > System Settings.
- Scroll down to Privacy & Security. Then, click on Location Services on the right.
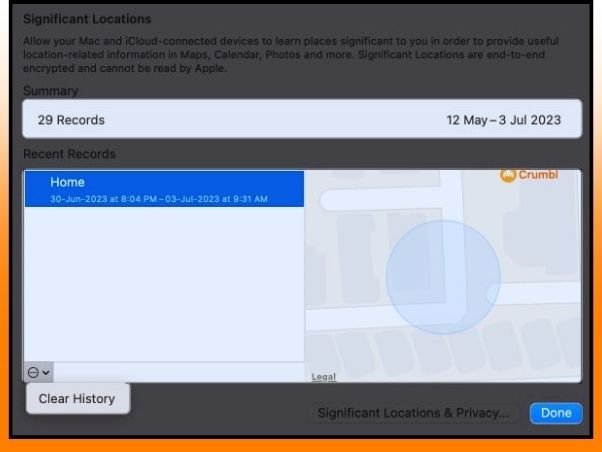
- Next to System Services, click Details.
- Click on Details next to Important Locations.
- There should be a summary and most recent records of where you’ve been.
To delete records, click “More” with the down arrow and “Clear History.” - Press “Done.”
FAQs
If I turn off position records, what will happen?
If you disable Significant Locations, your smartphone will no longer trace where you’ve been. Apple applications and services employ Personalized Location Services, including Driving Focus, Calendar, and Maps. They will also be affected.
Wrap up
The Location History function might be beneficial if you wish to review your recent journeys or determine how long your regular commute takes. It also adds extra security in case anything terrible happens at a specific time and location.
Unfortunately, your Apple device only displays limited data. Get around this via Google Maps. Any other ideas? Post them below!